With at least one Template saved in your account you are ready to start Checklists.
How to start one or many new Checklists.
Starting one Checklist
To start a new Checklist click the Start Checklist button in the left hand menu.

A Checklist needs:
- A Template to be copied from.
- A Name for this particular copy of the Checklist.
- An optional Folder to store the copy of the Checklist in.
- An options Due Date to set expectations for when work should be done by.
- An optional Assignment to other team members or shared externally via an email address.
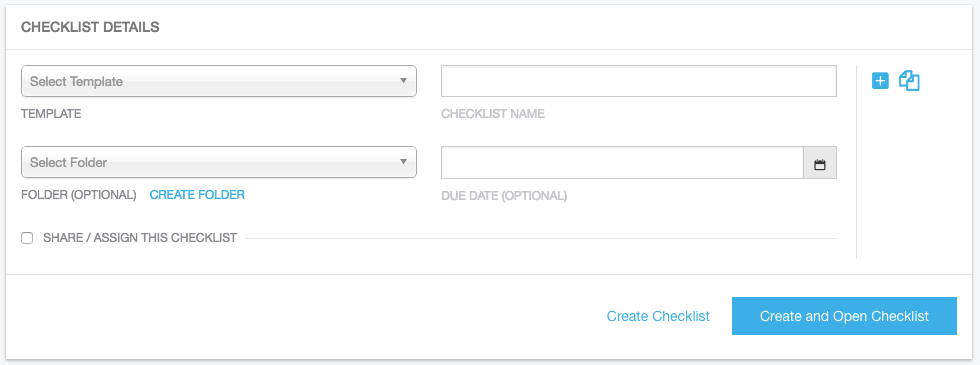
Use the dropdown or start typing to filter and select a Template.
By default the Checklist Name will be set to the name of the Template. You can change this to be something more relevant for the situation. The name can be updated later.
Optionally select a (or create a new) Folder for the Checklist to be stored in. Leaving this blank will create the Checklist in the unfiled section. The Checklist can be moved into a different Folder at a later time.
To set a Due Date for this Checklist click on the Calendar icon and pick and appropriate date/time for completion.
To have this work is Assigned to a Team member or Clever Shared to an external user then tick the SHARE / ASSIGN box.

Start typing in the names or email addresses of the people to be notified.
Fill out a message that will go in the email to the people you have shared with.
Now you are ready to start working on your Checklist.
Click the CREATE AND OPEN CHECKLIST button to start.

Starting Multiple Checklists
You can bulk create Checklists from different Templates on the Start Checklist screen.
To save more time if a are starting many similar Checklists you can Clone the details from the first one you fill out into multiple rows.
At the end of each Start Checklist row there are additional controls.
Add - Clone - Delete rows.

Add Row
Clicking the ADD ROW button will add an additional blank row with no details filled out.
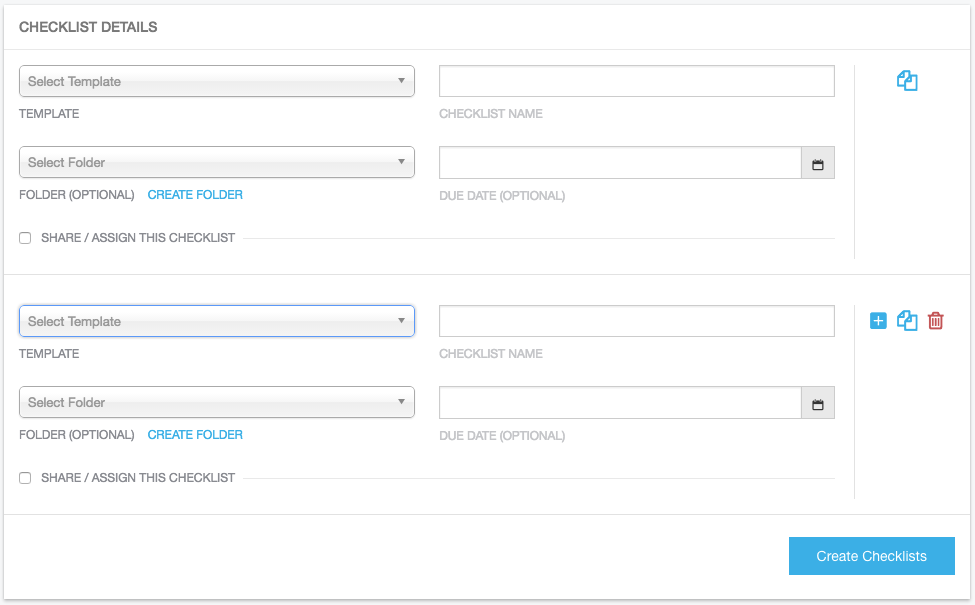
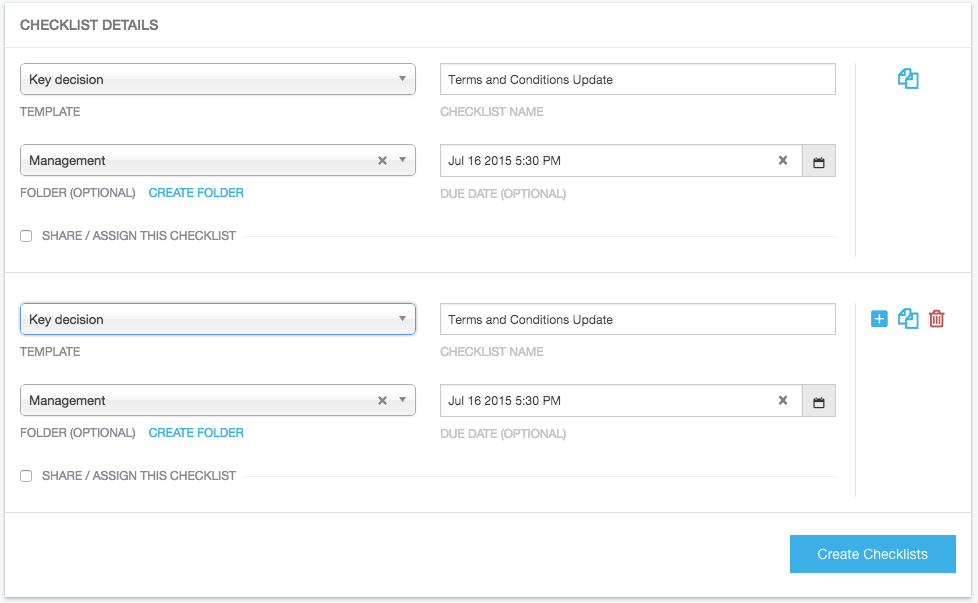
Clone Row
Clicking the CLONE ROW button will add another row with the all the same details from the original row.
You are able to edit all details of the row include the Template and Assignments.
Delete Row
The DELETE ROW button removes the row from the list.
You cannot remove the first row.
Opening in background
When you start a single Checklist you can choose the "CREATE CHECKLIST" button if you want it to be created but not opened on your screen.
Starting Multiple Checklists automatically uses this function and provides a summary screen with links to each individual Checklist.